
40 Easy Antique Furniture Makeover Ideas to Refresh Old Pieces
If you want to refresh old antique furniture, try repainting wooden chairs or distressing a vintage dresser for a charming look. Upholster that antique sofa with bold, beautiful fabric, or add a decoupage finish to a nightstand for a unique touch. Refinishing your coffee table can breathe new life into it, and using outdoor paint indoors can provide a fresh pop of color. Keep exploring for even more creative makeover ideas that suit your style!
Repainting Wooden Chairs

Repainting wooden chairs can breathe new life into your antique furniture collection. You can choose a vibrant chair color that matches your style, whether it’s a bold red or a soft pastel.
Start by prepping the surface with sanding and cleaning, ensuring the paint adheres properly. Using different paint techniques, like distressing or a smooth finish, can add character to your chairs.
Don’t forget to apply a protective topcoat for durability. With just a little effort, those old chairs will transform into stunning focal points in your home, showcasing your creativity and love for vintage decor.
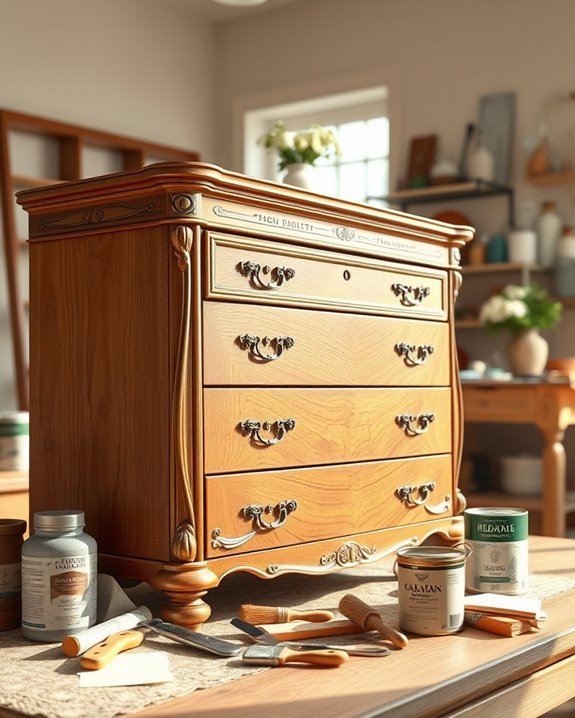
Distressing a Vintage Dresser

Transforming a vintage dresser into a distressed masterpiece can give it a charming, lived-in look that enhances your decor.
Start by choosing a vintage paint color that suits your style. Once you’ve painted the dresser, apply distressing techniques to create that worn appeal.
Use sandpaper to gently wear down corners and edges, revealing a bit of the wood underneath. You can also use a damp cloth to wipe away some paint for a more natural look.
Finish with a clear sealant to protect your hard work.
Enjoy your beautifully refreshed vintage dresser that now tells a story of its own!
Upholstering an Antique Sofa

If you’ve got an antique sofa that’s seen better days, upholstering it can breathe new life into your living space.
Start by choosing a beautiful antique fabric that complements your style. Next, remove the old upholstery carefully, taking note of how it’s constructed. This’ll help you when applying new upholstery techniques, like the classic method of tacking or stapling.
Make sure to replace any worn-out padding for comfort. Once you’ve secured the fabric, finish with trim or piping for a polished look.
With a bit of effort, your antique sofa will become a stunning focal point in your home!
Adding Decoupage to a Nightstand
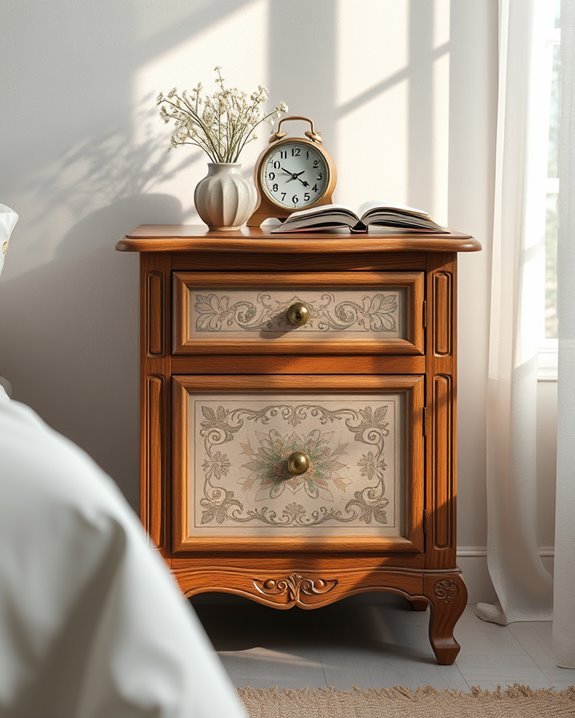
While you might think of a nightstand as just a functional piece, adding decoupage can turn it into a unique statement item in your bedroom.
Explore various decoupage techniques, like layering patterned paper or fabric, to enhance your nightstand’s style. Consider your nightstand’s existing design; vintage floral patterns work well with traditional styles, while geometric prints suit modern pieces.
Start by cleaning the surface, then apply your chosen decoupage medium, positioning your materials carefully. Seal it with a clear coat for durability.
This simple transformation can breathe new life into your nightstand, making it a focal point in your space.
Refinishing a Coffee Table

Refinishing a coffee table can be just as rewarding as giving a nightstand a fresh look.
Start by choosing a coffee table style that suits your space—be it rustic, modern, or mid-century. Next, strip the old finish and sand it down to prepare for painting.
When selecting coffee table paints, opt for a durable, high-quality finish that complements your decor. Don’t forget to apply a protective topcoat to guarantee longevity.
With some time and effort, you’ll transform that old table into a stunning centerpiece, breathing new life into your living room while showcasing your personal style.
Staining a Wooden Bench

Staining a wooden bench can transform its appearance and enhance the natural beauty of the wood.
Start by choosing the right wood stain options that suit your style, whether you prefer a rich mahogany or a light oak finish.
Before applying the stain, make certain to clean the bench thoroughly and sand it to guarantee a smooth surface.
Use a brush or cloth to apply the stain evenly, and let it dry completely.
To keep your bench looking great, follow these bench maintenance tips: regularly clean it, avoid direct sunlight, and apply a protective sealant every few years.
Enjoy your refreshed bench!
Creating a Chalk Paint Finish

Chalk paint offers a charming, matte finish that can breathe new life into antique furniture.
To create a stunning look, start by prepping the surface—clean and lightly sand if necessary. Next, apply your base coat using simple chalk paint techniques, ensuring even coverage.
Once dry, explore layering colors for added depth. Choose complementary shades, applying the second color with a dry brush for a distressed effect.
Finish with a clear wax to protect your work and enhance the finish. This method not only revitalizes your piece but also adds a unique, personalized touch that showcases your style.
Modernizing an Old Buffet

While you may love the character of an old buffet, it can feel outdated in a modern home.
Start by updating the buffet hardware; sleek, contemporary knobs or handles can make a significant difference.
Next, give it a fresh coat of paint in a bold or neutral hue to fit your style.
For buffet styling, consider incorporating modern decor elements, like geometric vases or minimalist art pieces.
You can also remove the doors for an open shelving look, showcasing your favorite dishware.
With these simple changes, your old buffet can become a stunning focal point in your space.
Converting a Cradle Into a Bench

Transforming an old cradle into a charming bench can breathe new life into your space.
Start by removing any hardware or bedding, then sand the cradle design for a smooth finish. Choose a color that complements your decor and apply a fresh coat of paint or stain.
Next, add a comfortable cushion to enhance bench comfort. You can even reupholster the cushion in a fun fabric to match your style.
Finally, place it in an entryway or living room to create a unique focal point. This functional piece won’t only look great but also serve as a cozy seating option.
Painting a Side Table With Ombre Effect

Have you ever wanted to add a touch of modern flair to an old side table? Painting it with an ombre effect is a fun way to achieve this!
Start by selecting two or three complementary colors. Using ombre techniques, blend the colors together on the surface, starting with the lightest shade at the top and shifting to the darker shade below.
You can use a foam brush or a spray paint for smooth color blending. This creates a stunning gradient that breathes new life into your table.
Once dry, seal it with a clear coat for lasting beauty and protection!
Replacing Hardware on a Cabinet

Replacing hardware on a cabinet can dramatically change its appearance and enhance its functionality. Start by choosing hardware that complements your cabinet’s style—whether it’s vintage, modern, or rustic. Consider materials like brass or ceramic for a unique touch.
Once you’ve selected the perfect knobs, gather your tools and prepare to install them. Remove the old hardware carefully, then mark the placement for the new knobs to guarantee even spacing. Drill new holes if necessary, and finally, secure the knobs in place.
This simple update can breathe new life into your cabinet, making it both stylish and practical.
Revamping a Vanity With Mirrors

Updating your cabinet hardware can set the stage for an even more striking makeover—especially when it comes to revamping a vanity with mirrors.
Start by choosing a mirror placement that enhances the space, perhaps a large statement mirror or a collection of smaller ones.
Next, consider applying vintage finishes to the vanity, like a distressed paint or antique glaze, which can add character and charm.
Don’t forget to coordinate your new hardware with the vintage theme for a cohesive look.
This combination will breathe new life into your vanity, making it both functional and a stunning focal point in your room.
Turning an Old Door Into a Desk

Transforming an old door into a desk can be an incredibly rewarding project that adds character to your workspace. Start by selecting a sturdy door that suits your style, then choose legs or a base that complements its vintage charm.
Sand the surface for a smooth finish, and consider painting or staining it to match your decor. Don’t forget to add storage options like shelves or drawers to enhance functionality.
This door desk not only serves a practical purpose but also showcases your creativity, making your vintage workspace uniquely yours. Enjoy the satisfaction of creating something beautiful and functional!
Applying Gold Leaf to Furniture Accents

While you might think that adding a touch of luxury to your furniture is a challenging task, applying gold leaf can actually be a simple way to elevate your decor.
Start by choosing the furniture accents you want to highlight, like drawer pulls or ornate carvings. Clean the surface thoroughly, then apply a layer of adhesive for the gold leaf application.
Carefully lay the gold leaf over the adhesive, pressing it gently to guarantee it adheres. Once dry, use a brush to remove any excess leaf.
This quick technique can transform your antique pieces into stunning focal points in your home.
Using Fabric to Line a Drawer

If you want to add a touch of charm to your antique furniture, lining the drawers with fabric is a great way to do it. Choose a drawer fabric that complements your piece’s style, like floral prints or solid colors.
First, measure the drawer and cut the fabric to size. You can use lining techniques like Mod Podge to adhere the fabric or opt for double-sided tape for an easier option.
Smooth out any bubbles for a clean finish. This simple project not only enhances the aesthetic but also adds a layer of protection, keeping your drawer contents safe and sound.
Repurposing a Vintage Suitcase Into a Table
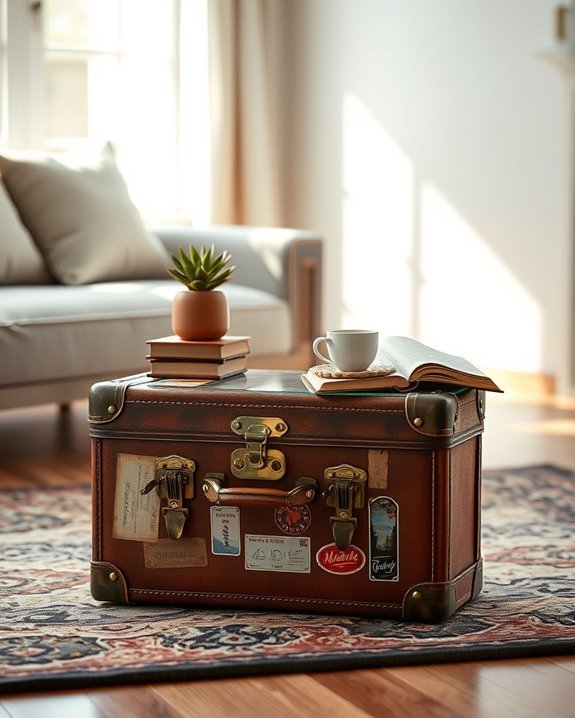
Have you ever thought about turning an old suitcase into a unique table? It’s a fun project that not only adds character to your space but also provides creative storage solutions.
Start by choosing a sturdy vintage suitcase, preferably one with interesting patterns or colors. Secure it to a set of hairpin legs or a small table base for stability.
You can leave it as-is for a rustic look or paint it to match your décor. This vintage suitcase table will become a conversation starter while cleverly hiding your books or knick-knacks inside.
Enjoy your stylish, functional creation!
Stenciling Patterns on a Chair

After transforming a vintage suitcase into a stylish table, why not give an old chair a fresh look with some creative stenciling?
Start by choosing a design that complements your chair design and fits your style. Gather your stenciling supplies, including brushes, paint, and a stencil.
Use simple stenciling techniques like dabbing or brushing to apply paint evenly. You can add patterns to the seat, backrest, or legs for a unique touch.
Don’t forget to seal your work with a clear coat to protect your design. This easy makeover will breathe new life into your chair and enhance your space!
Creating a Galvanized Metal Finish

While you might think of metal finishes as something only found in new furniture, creating a galvanized metal finish on your antique pieces can add a modern edge and a unique character.
Start by cleaning the surface thoroughly to guarantee proper adhesion. Apply a base coat in a light gray to mimic metal.
Next, use a sponge or brush to layer on a metallic paint, focusing on achieving a galvanized texture.
Finally, finish with a clear topcoat to protect your work. The result will be a stunning metal patina that transforms your antique furniture into a contemporary masterpiece.
Enjoy your refreshed piece!
Updating a Dining Table With Epoxy Resin

If you’re looking to infuse your dining table with a fresh, modern look, epoxy resin is an excellent choice. You can use various epoxy techniques to create stunning designs, from swirling colors to adding unique elements like dried flowers or metallic flakes.
Begin by sanding your table’s surface for better adhesion, then mix the epoxy according to the package instructions. Pour it over the table and let it cure.
This not only enhances aesthetics but also boosts table durability, making your furniture resistant to scratches and stains. With a little creativity, you’ll have a one-of-a-kind piece that stands out!
Transforming a Steamer Trunk Into a Coffee Table

Transforming a steamer trunk into a coffee table not only adds unique character to your living space but also serves as a functional piece with plenty of storage.
Start by cleaning and sanding the trunk to refresh its surface. Use upcycling techniques like painting or staining to match your decor. You can add vintage-style hardware for extra charm.
Consider lining the interior with fabric for a stylish storage solution. Finally, place it in your living room and enjoy the blend of history and practicality.
This project not only beautifies your home but also provides an excellent conversation starter.
Adding a Glass Top to a Vintage Table

After giving new life to a steamer trunk, you might want to explore another way to enhance your vintage furniture.
Adding a glass top to your vintage table not only protects the surface but also elevates its style. You can choose from various glass top materials, including tempered or frosted glass, to match your table’s aesthetic.
This works particularly well with ornate vintage table styles, allowing their unique features to shine through. Simply measure your table, cut the glass to size, and secure it with non-slip pads or clips.
Enjoy a fresh look while preserving the charm of your vintage piece!
Painting a Bookshelf a Bold Color
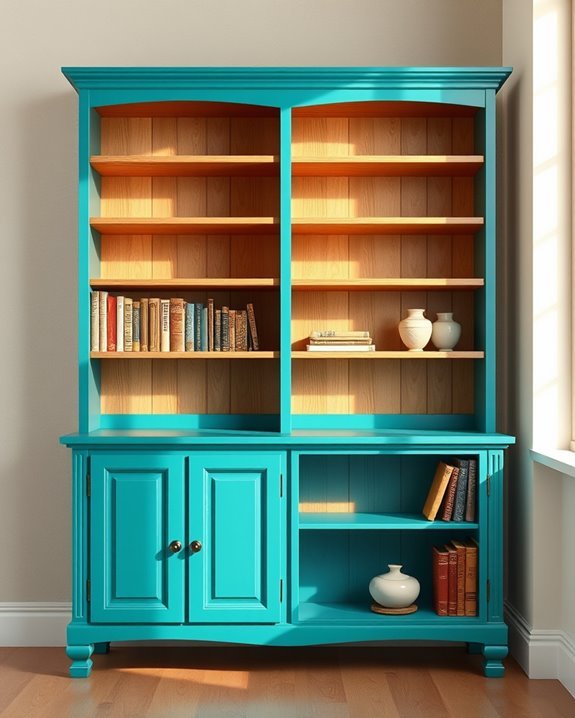
While a vintage bookshelf can be a stunning focal point in your home, painting it a bold color can truly make it pop. Choose vibrant hues like deep blue, emerald green, or fiery red to create an eye-catching statement.
Consider color combinations that complement your existing decor or contrast for extra drama. Different bookshelf styles, like mid-century or shabby chic, can enhance the overall aesthetic when painted.
Don’t forget to prep the surface and use quality paint for a lasting finish. With just a few strokes, you’ll transform your bookshelf into a stunning piece that adds personality to your space.
Using Washi Tape for Unique Designs

If you’re looking to add a touch of creativity to your antique furniture, using washi tape can be an easy and fun solution.
With its wide array of colors and washi tape patterns, you can transform ordinary surfaces into eye-catching pieces. Try applying strips of tape in geometric shapes or creating stripes for a modern twist.
You could even layer different patterns for unique designs that reflect your personality. It’s removable, so you can experiment without commitment!
Just remember to clean the surface beforehand for the best adhesion. Your furniture will look fresh and stylish in no time!
Refinishing a Rocking Chair

Refinishing a rocking chair can breathe new life into an old favorite, making it a rewarding DIY project.
Start by evaluating your vintage chair’s condition; look for scratches, dents, or loose joints. Next, strip the old finish using a chemical stripper or sandpaper, then clean the surface thoroughly.
For rocking chair restoration, consider applying a wood conditioner before staining or painting. Choose a color that complements your decor and apply it evenly.
Finally, seal the finish with a protective topcoat for durability. With these steps, your rocking chair won’t only look stunning but also serve you for years to come.
Installing New Legs on a Low Table
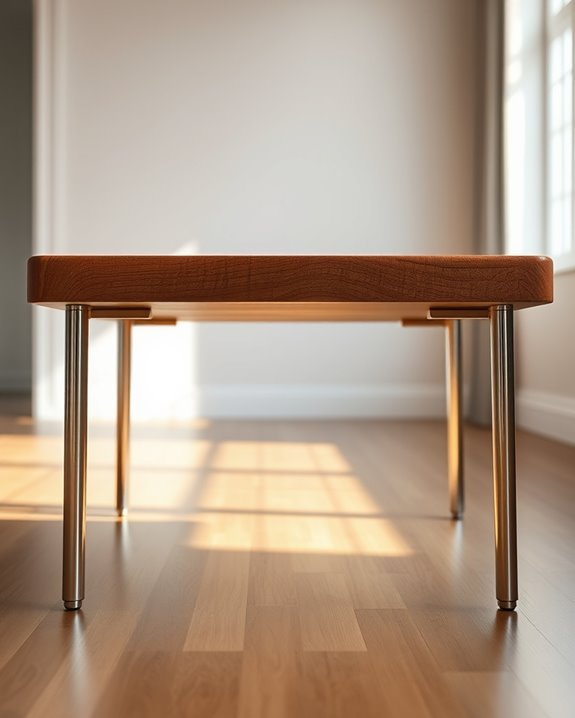
Transforming a low table by installing new legs can elevate its style and functionality, giving it a fresh look that fits your space perfectly.
Start by measuring height to verify your new legs complement the table’s proportions. When choosing legs, consider the material and design; wooden legs offer warmth, while metal legs can add a modern touch.
Once you’ve picked the perfect legs, detach the old ones carefully, making sure not to damage the table.
Finally, attach the new legs securely, and you’ll have a stunning centerpiece that not only enhances your decor but also serves its purpose beautifully.
Converting Old Windows Into Decorative Shelves

While you might think old windows are just remnants of the past, they can be creatively repurposed into charming decorative shelves that showcase your favorite items.
To start, find a window with a unique shape or design. Clean it thoroughly and decide whether to leave the glass in or remove it for a more open feel. Use brackets or mount it directly to the wall for support.
For window display ideas, mix books, plants, and family photos. Remember shelf styling tips like balancing larger items with smaller decor to create visual interest, making your old window a stunning focal point in any room.
Using a Paint Sprayer for a Smooth Finish
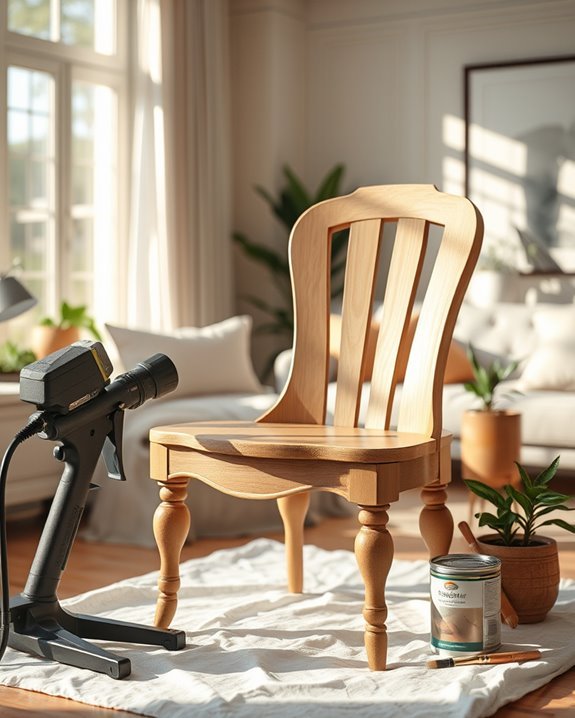
After giving your old windows a new life as decorative shelves, you might want to tackle another project: refinishing antique furniture.
Using a paint sprayer can transform your pieces, providing a sleek, professional finish. Start by preparing your furniture; clean and sand it to guarantee paint adhesion.
Then, master some paint sprayer techniques, like holding the sprayer at a consistent distance and moving in smooth, even strokes. This helps in achieving smoothness without drips or uneven patches.
Don’t forget to use a primer and finish with a protective topcoat for lasting durability. Enjoy your beautifully refreshed antique furniture!
Creating a Farmhouse Look With White Distress

If you’re aiming to create a cozy farmhouse look, distressing your antique furniture with a fresh coat of white paint can work wonders.
Start by thoroughly cleaning the piece and applying a primer. Once dry, paint it with a soft white, allowing it to dry completely.
For that perfect farmhouse aesthetic, use sandpaper to gently distress edges and corners, revealing the wood underneath. This technique adds character and warmth, giving your furniture a lived-in feel.
Finish with a clear wax or topcoat for protection. Embrace the charm of white distressing and transform your old furniture into stunning farmhouse treasures!
Adding Corkboard to a Hall Tree
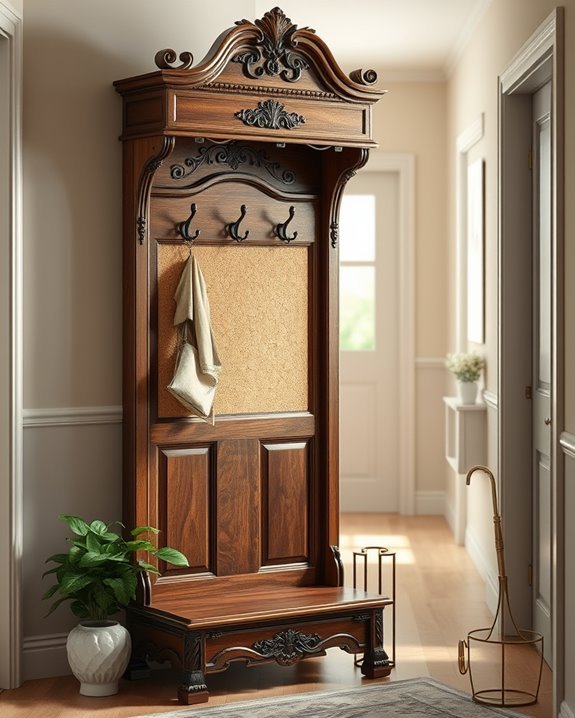
Creating a cozy farmhouse look can lead you to explore other functional yet stylish enhancements for your home. One great idea is adding corkboard to your hall tree.
This addition not only complements the hall tree design but also provides a practical spot for notes, reminders, and cherished photos. For ideal corkboard placement, choose an area that’s easily accessible, perhaps above hooks or near a bench.
Using Old Maps for Decoupage

Transform your antique furniture with a unique twist by using old maps for decoupage.
Start by selecting antique maps that resonate with you; these can add character and history to your piece. Cut the maps into various shapes or strips, then apply a layer of decoupage medium to your furniture.
Carefully place the map pieces, smoothing out any bubbles. Once everything’s in place, seal it with another coat of the medium for durability.
This creative decoupage technique not only revives your furniture but also tells a story, making your antique piece a conversation starter in any room.
Replacing a Chair Seat With a Cushion

Adding a cushion to your antique chair can enhance comfort while giving it a modern flair.
For a simple seat replacement, start by removing the old seat. Measure the dimensions to guarantee your new chair cushion fits perfectly.
Choose a fabric that complements your décor, and cut the cushion to size if needed. Secure it to the chair frame using a staple gun or screws.
If you want extra flair, consider adding decorative trim or piping to the edges.
This transformation not only revitalizes your antique chair but also provides a cozy spot to relax, bridging the gap between old and new.
Making Over a Nightstand With Metallic Paint
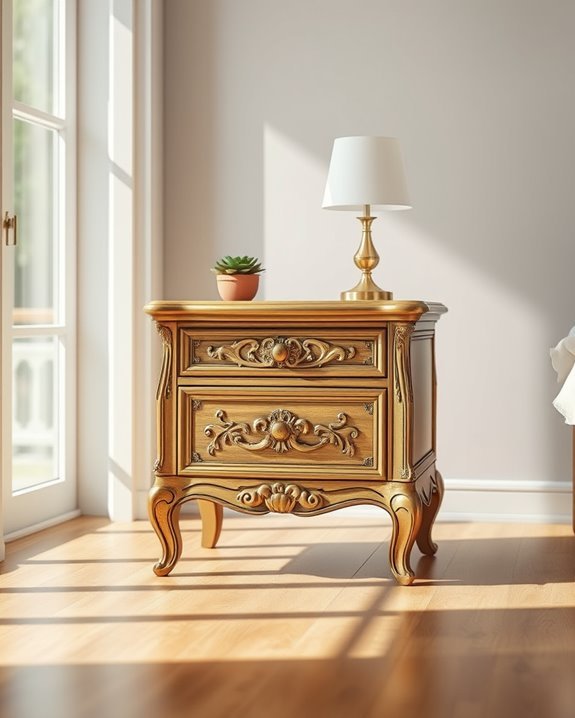
While you might think of antique furniture as solely belonging to the past, giving your nightstand a makeover with metallic paint can breathe new life into it.
Start by sanding the surface to create a smooth base, then apply a primer to guarantee the metallic finishes adhere well.
Choose a vibrant gold, silver, or bronze to enhance its charm. Using a brush or spray can, apply the paint evenly, letting it dry completely between coats.
This nightstand transformation not only updates its look but also adds a modern twist to your space.
You’ll love how it shines and stands out!
Turning an Old Ladder Into a Bookshelf
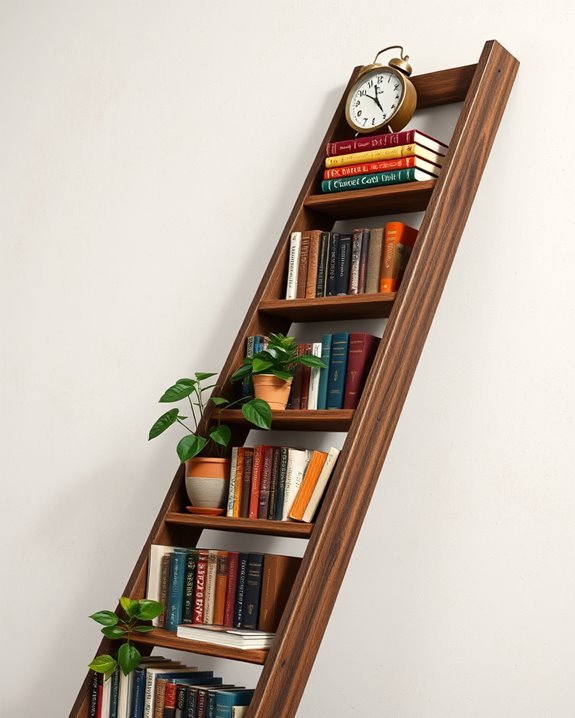
Have you ever considered how an old ladder could become a stylish bookshelf?
With a simple ladder design, you can transform your space and showcase your favorite reads. Start by leaning the ladder against a wall for a casual look. For bookshelf placement, use the rungs to hold books, plants, or decorative items.
You can even paint or stain the ladder to match your decor. If you want added stability, secure it at the base.
This unique and functional piece not only saves space but also adds character to your room. Give your old ladder a new lease on life today!
Refreshing a Wardrobe With New Paint
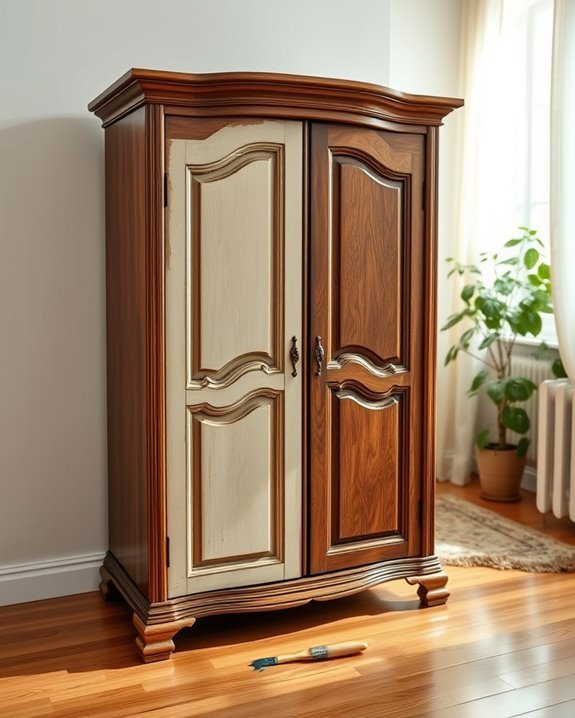
Transforming furniture doesn’t stop at ladders; rejuvenating a wardrobe with new paint can breathe new life into an old piece.
Start by removing the wardrobe hardware, like knobs and hinges, to guarantee clean lines. Choose a color that complements your space and consider various paint techniques, such as distressing for a vintage look or a sleek matte finish for modern appeal.
Apply a primer first for better adhesion, then use a brush or roller to achieve an even coat. Once dry, reattach the hardware, and watch your refreshed wardrobe become a stunning focal point in your room.
Creating a Mosaic Top for a Table

Creating a stunning mosaic top for a table can instantly elevate its aesthetic and add a personal touch to your decor.
Start by selecting your table surface materials—wood, glass, or metal work well. Use mosaic design techniques like cutting tiles or glass into desired shapes, then arrange them in a pattern you love.
Secure the pieces with adhesive, ensuring they’re spaced evenly. Once dry, apply grout to fill the gaps, wipe off excess, and seal the surface for protection.
This creative project not only revamps your table but also showcases your artistic flair and unique style!
Adding Decorative Trim to Furniture
Although it might seem like a small detail, adding decorative trim to furniture can greatly enhance its overall appeal.
You can choose from various trim styles, like intricate decorative molding or simple, elegant designs, to suit your taste. Start by measuring the edges of your furniture piece, then select a trim that complements its design.
Use a strong adhesive to attach the trim, ensuring it’s evenly placed. Once it’s secure, you can paint or stain it to match or contrast with the furniture.
This simple addition can transform a plain piece into a stunning focal point in your home.
Using Outdoor Paint for Indoor Furniture

If you want your indoor furniture to withstand the test of time while adding a splash of color, consider using outdoor paint. This type of paint offers outdoor durability, making it resistant to wear and tear, spills, and scratches.
You’ll find that outdoor paint also provides indoor versatility, allowing you to achieve a variety of finishes—from glossy to matte. Plus, it comes in a wide range of colors, so you can easily match your décor.
Just guarantee proper ventilation while painting and allow adequate drying time. With outdoor paint, your furniture can truly shine in any indoor space!
Applying a Patina Finish for a Vintage Look

To achieve a stunning vintage look, applying a patina finish can transform your antique furniture into a true statement piece.
Start by selecting your preferred patina techniques, like glazing or using a wax finish, to enhance the wood’s natural grain. Mix paints or stains to create a layered effect that mimics aged wood.
Apply the finish with a brush or cloth, working in small sections for an even appearance. Once dried, lightly sand the edges to reveal the underlying colors, adding depth.
These vintage aesthetics not only refresh your furniture but also give it character and charm, perfect for any home.
Incorporating Vintage Fabric Into Furniture

Incorporating vintage fabric into furniture can breathe new life into your pieces, making them unique and full of personality.
You’ll find that vintage fabric patterns offer a rich variety of colors and textures, allowing you to create stunning textile furniture combinations.
Try reupholstering an old chair with a bold floral print or adding a vintage fabric cushion to a simple sofa.
You can even use smaller pieces of fabric to create accents, like a patchwork table runner or decorative pillows.
These touches not only enhance your furniture’s charm but also tell a story, connecting the past with your present style.
Creating a Multi-Functional Antique Piece

Once you’ve added vintage fabric to your furniture, consider how to enhance its functionality.
Repurposing furniture is a fantastic way to create a multi-functional piece that maximizes space in your home. For instance, transform an old trunk into a stylish coffee table with hidden storage for blankets or magazines.
If you’ve got a vintage dresser, think about turning it into a chic TV stand. By creatively reimagining these antiques, you’ll not only breathe new life into them but also make them work harder for your space.
Embrace your creativity and watch your old pieces shine in new ways!
Conclusion
Revamping antique furniture is a rewarding way to breathe new life into old pieces. Whether you choose to repaint, distress, or upholster, each project allows you to express your personal style while preserving history. Don’t hesitate to mix and match techniques or add your own twist with decoupage or vintage fabrics. With a little creativity and effort, you can transform these treasures into stunning focal points in your home that reflect your unique taste. Happy crafting!


